Installation: Build on Windows
1. Software Required
- TortoiseHG [Download]
- Visual C++ 2008 Express [Free Download] (Download and run vcsetup.exe) or Visual C++ 2010 Express [Free Download].
- MySQL server [Community Edition Download] (We recommend to use the most recent 5.1.x version. If you choose to use another version, do NOT download the Essentials package. You will not be able to compile the core using that package. Download the 32bit version if you have a 32bit compiler and the 64bit version if you have a 64bit compiler.)
- .NET Framework 3.5 [Download] (this should already have been installed with your Windows updates)
- SQLYog [Community Edition Download] or MySQL GUI Tools
- CMake 2.8.2 for Windows [Download]
- OpenSSL 1.0.0b for Windows [Download] (Download the 32bit version if you have a 32bit compiler and the 64bit bit version if you have a 64bit compiler - Do NOT use the light version.)
If you use different PCs to compile and run Unity, install one of the following packages on your Server PC to avoid missing dependencies (depending on your Visual Studio Version and your Server PC Operating System)
- Microsoft Visual C++ 2008 Redistributable Package SP1 [x86] / [x64]
- Microsoft Visual C++ 2010 Redistributable Package [x86] / [x64] / [ia64]
Again:
- For OpenSSL, do NOT use the light version.
- For MySQL, do NOT use the "essential"-version.
2. PULLING AND COMPILING THE SOURCE
Before you start this phase you should have installed TortoiseHG, Visual Studio, MySQL, and OpenSSL.
Pulling the Source
Create a directory in which Core files will be pulled (for example: C:\UnityCore).
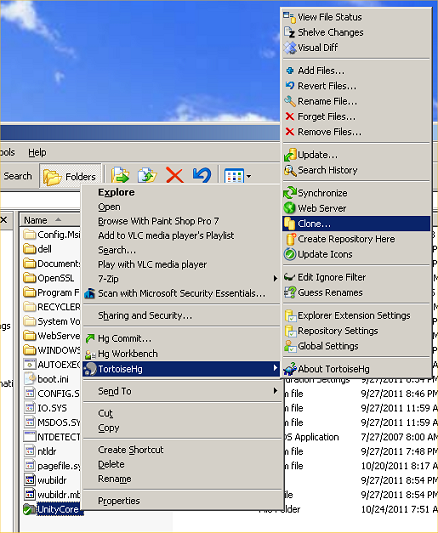
Right-click on the directory and click on 'TortoiseHG' -> 'Clone...'.
Fill in the data as follows:
Source Path: http://bitbucket.org/Unity/unity
Destination Path: C:\UnityCore
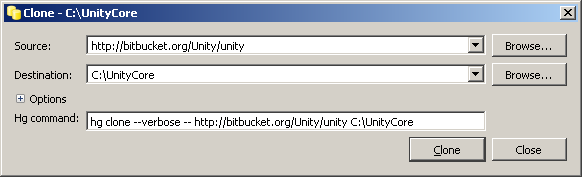
Click on 'clone'. Wait a few minutes (or less) and all the files will be pulled in the directory C:\UnityCore.
3. Configuring and Generating Visual C++ solutions with CMake
In order to avoid possible issues, you cannot build the core in the directory where you have stored the source code. It must be built in a separate directory. In our case, we've placed it in C:\UnityBuild (your location could be somewhere else, if you choose for it to be).
Since you have downloaded the required software above, you should have the MySQL / OpenSSL headers and related files already in place and ready to go. If you haven't installed the required software, STOP and do that now.
REMEMBER:
- For OpenSSL, do NOT use the light version
- For MySQL, do NOT use the "essential"-version.
As stated on the MySQL page :
The Windows "msi-essential-*" installers do not include: Instance Manager tool, Documentation, Development headers etc.
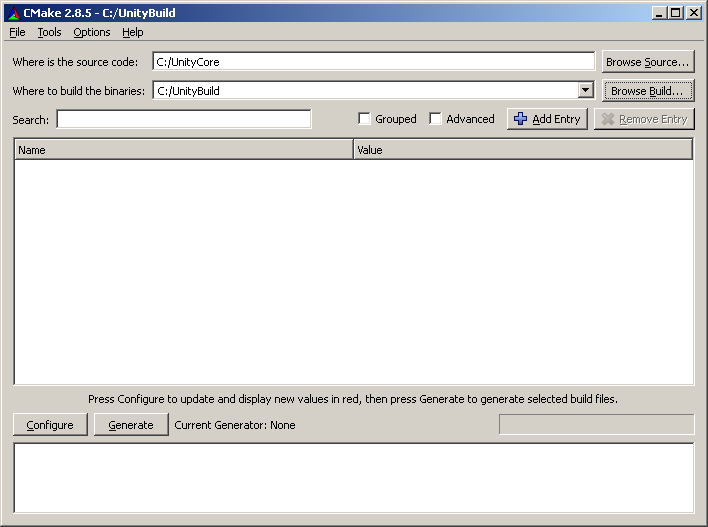
Open the CMake GUI - The window will look similar to this:
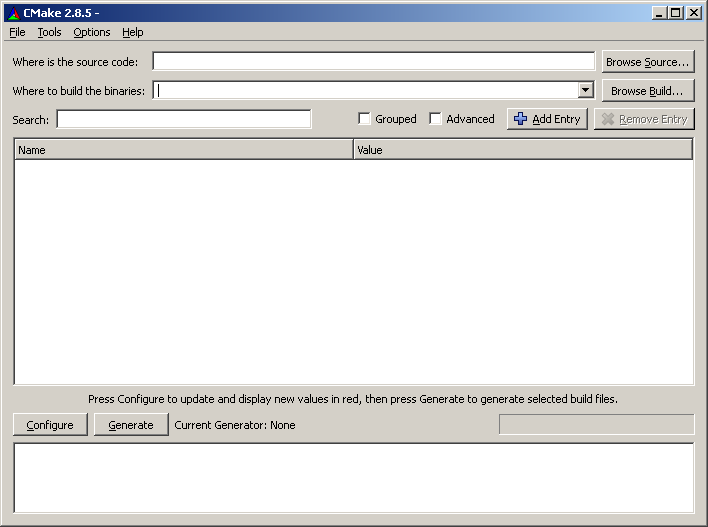
The two top text areas are used to tell CMake where look for the source tree, and where to put the build files.
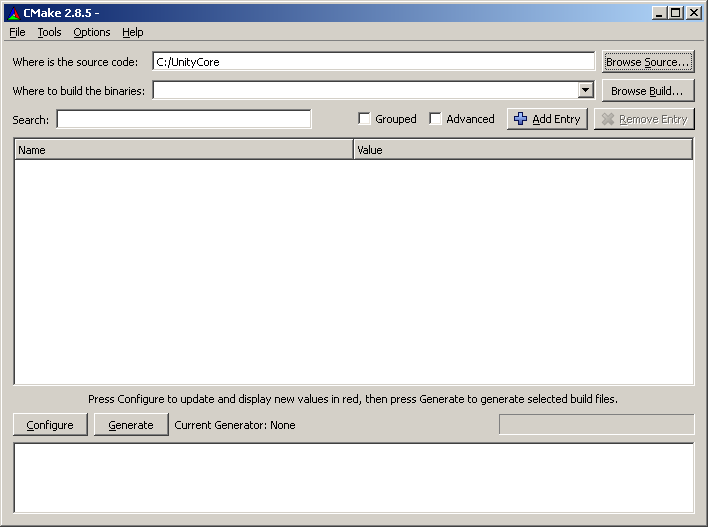
Now set the source to where you have checked out the UnityCore source code (in this case C:/UnityCore), and then set the Build directory to where you have created your dedicated folder (in this case C:/UnityBuild) using the Browse buttons as in the screenshots.
Setting the Source Directory
Setting the Build Directory
When you have set the source and build directories, you can click Configure.
CMake is capable of creating VS6, VS7 + VS7.NET, VS8, VS9 and VS10 solutions and project files.
Configure the Project
Note! CMake is NOT a cross-architecture compiler; it merely generates the build files required for the compiler you choose. Choose the option for the compiler that you are actually running. STOP and check which one, if you are not sure.
Choose your Compiler
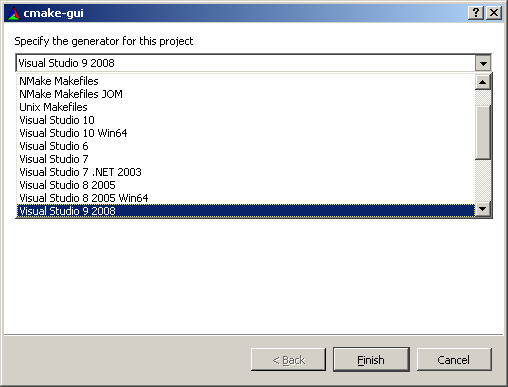
Then click Finish.
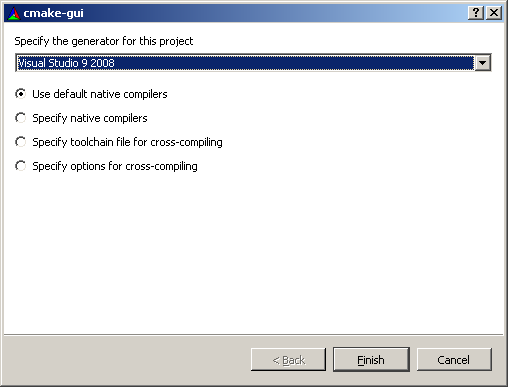
Continue with your Compiler Choice
After you click Finish, cmake will process the source code and analyze the CMakeLists.txt for the various source components.
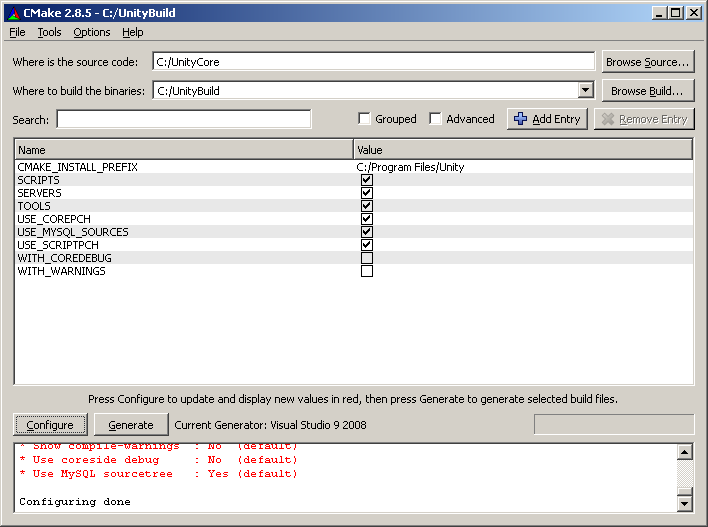
When it has finished, you will see a list of options which need to be confirmed (the red parts).
Confirm Build Options
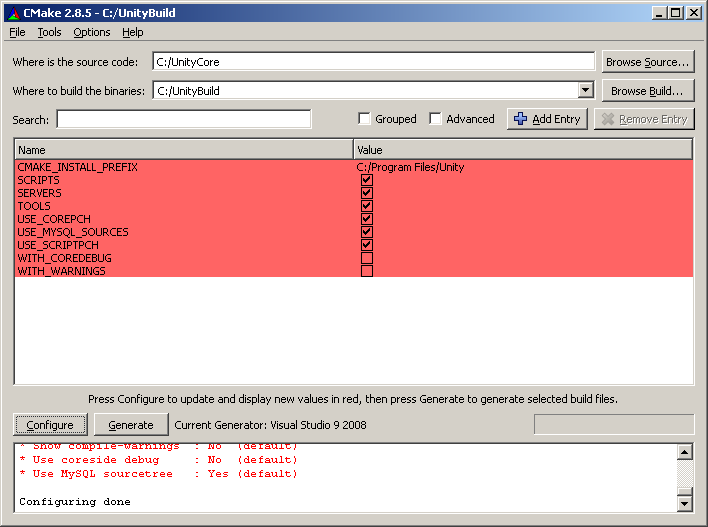
Go through them and check/uncheck those you want enabled/disabled (you can hover the options to see what they are used for).
If you have installed MySQL version other than 5.1, be sure to UNCHECK the WITH_MYSQL_SOURCES option. This tells CMake to look for include files and libraries in your MySQL installation instead of using the MySQL source files provided with UnityCore (which are 5.1.50). Remember, unchecking WITH_MYSQL_SOURCES requires that you have full MySQL package (not Essentials) and that your selected compiler is for the same architecture (32bit/64bit) as your MySQL. If you have 5.1.x, you need not worry - just leave WITH_MYSQL_SOURCES checked.
The text area at the bottom on the cmkae GUI will display important notifications of what the program found while configuring your build. If there are any errors in the list, check your system to find the proper way to handle them.
Here are the default options:
UnityCore Defaults
Once you have made all of your choices, click Configure again to confirm them.
Confirm Build Options
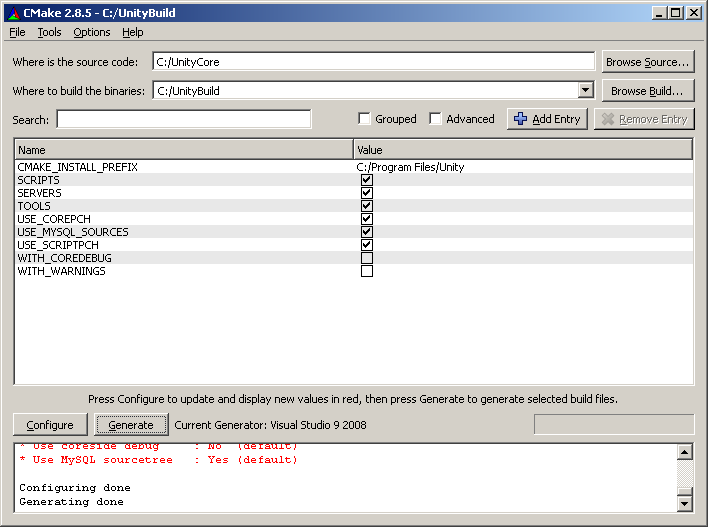
If CMake finds errors in your configuration, it will return to the confirmation list, with the options displayed in red. Review the notification area, and make whatever changes are called for. If CMake finds no issues, the option area will be white, and you are ready to continue.
Click on Generate, and CMake will create the solutionfiles/projectfiles/makefiles it requires to build for your specific compiler.
When CMake is finished, you will see a messages that says "Generating done". At this point, you are ready to start your compiler and build the core.
Open your build folder, then open the solution file and proceed to the next step - Compiling the Source.
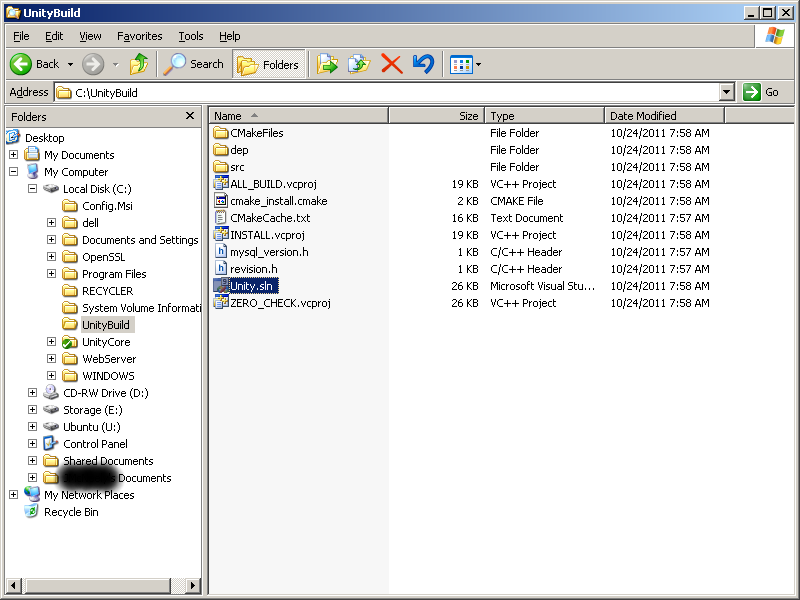
4. Compiling the Source
Go on the compiler's top menu 'Build' and click on Configuration Manager. Make sure you set the build to 'release Win32' or 'release x64' depending on the Operating System UnityCore will be running on and what you have set during CMake configuration.
Warning: Visual C++ 2008 Express edition does not support the 64 bit platform. You will need to install the full Visual Studio, as well as additional components to enable 64 bit support. Refer to Microsoft's website and documentation for more details.
Now go back to the 'Build' menu and click on 'Clean Solution'. Unless you are just testing a compilation, it is always best to clean your build before compiling your new UnityCore revision. Compilation length differs from machine to machine, you should expect it to take 15-30 minutes.
You will find the following message once the compilation has finished successfully:
========== Build: 14 completed, 0 failed, 0 up-to-date, 1 skipped ==========
You will find the freshly compiled binaries in the C:\UnityBuild\ folder, in this example, as specified during the CMake configuration process.
You will need the following files in order for the core to function properly:
ACE.dll
libeay32.dll
libmySQL.dll
ssleay32.dll
authserver.conf.dist
authserver.exe
worldserver.conf.dist
worldserver.exe
Delete any other file which is not in the above list, you will not need them.
5. Keeping the code up to date
Our Developers are always at work fixing and adding new features to the core. You can always check them here or by using the ToroiseHG View Changelog option.
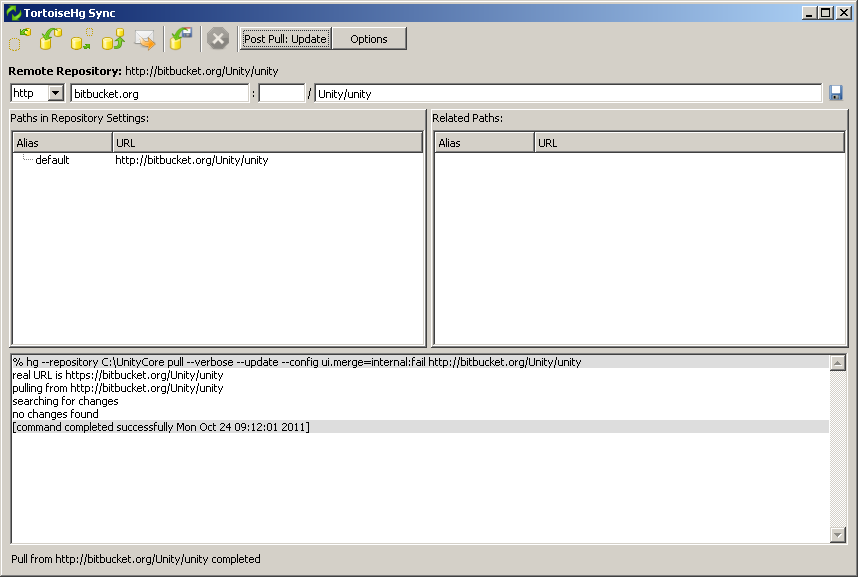
Simply right-click on your C:\OregonCore folder and click on 'TortoiseHG' -> 'Synchronize'.
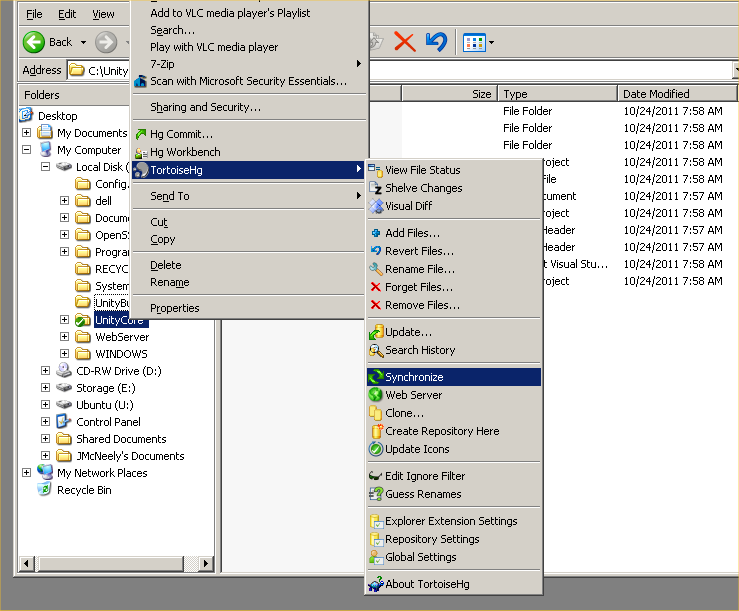
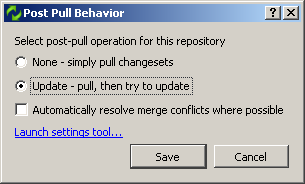
Set the Post Pull options to update by clicking "Post Pull: None"...

... and changing the option.
Then click on the button 'pull' at top of the window and it will start pulling the new/updated files.
Now you can repeat the compiling procedure above.
It is always best to remove the binaries from the C:\UnityBuild\bin folder every time you compile a new revision (and remember to clean your build).